add sr + amit

Adjagot by AsR

.


Sunday, August 7, 2011

Chinese SYMPHONY x101 Foemat ok

Chinese SYMPHONY x101Foemat ok


br

MXKEY v3.5 revision 1.3 - MEGA UPDATE - The only NOKIA BOX with TMA included

BUY ORIGINAL XTC CLIP

SPECIAL PRICES IN USD with FREE SHIPPING


v3.5 revision 1.3, Public-Release
MEGA UPDATE


What is new added, changes and improvements:


- added USB STANDALONE security repair function *** for ALL HASH for RAPUYAMA phones.
( required HTI with firmware 00.17 )

- added USB STANDALONE security repair function *** for ALL HASH for RAPIDO phones.
( required HTI with firmware 00.17 )

***
SX4AUTH (PA_SL/PA_SL2/PA_SL3/PA_SIMLOC30)
SD REPAIR (PA_SL/PA_SL2/PA_SL3/PA_SIMLOC30)
SIMLOCK REPAIR (PA_SL/PA_SL2)
NCK CALC (PA_SL/PA_SL2)
SL3 BF HASH CALC (PA_SL3/PA_SIMLOC30)
SL3 NCK CALC (PA_SL3/PA_SIMLOC30)


- added: SL3 Logger (sl3u.exe - Standalone SL3 Logger/Unlocker/LOG Converter)
Optimized for SL3 unlock task using HTI or USB cable.


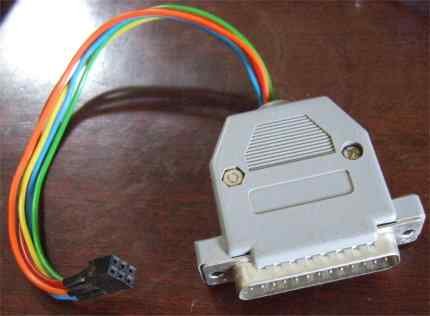
This image has been resized. Click this bar to view the full image. The original image is sized 707x435.


- added: SL3 Bruteforce (sl3bf.exe) 'load at windows startup' option.


- added, notification messages for important function


- added, optional screen recorder
using separated application *quot;camcl.exe*quot;, use *quot;Record Session*quot; on system menu
(right click window titlebar)
captured videos will be saved as *quot;capture.avi*quot; in the windows temp folder
will be usefull for reporting bug or something else


- added: connection status/speed information on connect


- moved *quot;[BB5,USB]Use New Protocol for RAPIDO*quot; option to config-*gt;Directory
If enabled, will use new loader else will use old loader(embedded to MCU file)
RAPIDO phones with New Protocol connected to HS(High-speed) USB allows to use CERT backup/restore.
Old RAPIDO and RAPIDO connected to non HS USB will not backup CERT due to USB limitation.


NEW ADDED

- added: model selection by type designator or phone description

- added, fw version check between connected phone, mcu image, server during 'Scan Phone'

- added, fw version check between selected mcu image and server during 'market select'

- added, *quot;Copy All Links*quot; on Nokia Download Window

- added, auto complete on Model selection

- added: more detailed description of errors if an error occurs

- added: *quot;[BB5]Use New Protocol for RAP3Gv3*quot; option to config-*gt;Directory

- added: phone`s image load from server(if any).

- added: latest firmware version check(if any) for BB5 phone on market select.

- added update dialog window when HTI firmware outdated.


BUG FIXED:

- bugfixed: Nomadik dead usb flashing (Bootstrap failed)

- bugfixed: RAP3Gv3 dead usb flashing (stop at sending bootloader)

- bugfixed: usb3 connection status query

- bugfixed: XGOLD 213 *quot;Use Embedded SBL from MCU*quot; does not work if BB5 selected in generation dropdown.

- bugfixed: access violation on synchronize files when Download window opened.

- bugfixed: application crash on load in some os(win7 x86 no sp).

- bugfixed: XGOLD213 usb flashing error when no mcu spesified

- bugfixed: SL3 read PhoneIDs shows 'Operations not supported'

- bugfixed: X1-01 XGOLD flashing bug.

- bugfixed: No progressbar on flashing.

- bugfixed: New RAPIDO SL3 read PhoneIDs shows 'Operations not supported'

- bugfixed: processing file with size more than 900MB.

- bugfixed: emulate phone on New Protocol causing application to be hang.

- bugfixed: random crash on buscheck with usb connection

- bugfixed: dead after flashing in NOR flash devices (affected on x64 pc with memory more than 4GB)


OTHER CHANGES IN IMPROVEMENTS

- Renamed 'Image DL' caption to 'Download' as this will be easier to understand

- 'Download' will show input dialog if no product code spesified

- local rfbb will also handle rfbb file format

- local dcc will also handle pm file format

- changed FlashLoader selection from dropdown to checklist as this will be more user friendly.

- changed SoftTMA to slider as this will be more user friendly.

- Some UI changes
Add fading on loading module using balloon hint instean of ordinary hint

- changed manifest of mobileEx.exe, SL3 Bruteforce (sl3bf.exe) from 'asInvoker' to 'requireAdministrator'.
Library and modules will need to update their xml configuration files regularly,
or create if xml configuration is not exists. This operation required admin level on vista and win7 core.

- to not confuse users, Nokia USB ROM is now displayed only when no physical NMWCD* device connected
for dead usb flashing, Nokia USB ROM should be used instead of 'Phonet' device
* NMWCD: Nokia Mobile Wireless Communication Devices

- improved auto enable RAPIDO *quot;FUR Cold Boot*quot; by usb hub information

- improved synchronize files routine, auto retry when download failed.

- improved GetFlashAddress and Custom Erase function
(not pooling phone after operation)

- improved *.default(config update) file handling

- removed experimental *quot;run in main thread*quot; bug caused app hang

- usb flashing routine improved

- usb connection handling improved


420 Links to download MxBox/MxKey v3.5 rev1.3 for FREE


1. 14 links for mobileEx_setup_v3.5_rev1.3_20110806.exe

2. 14 links for mobileEx_setup_v3.5_rev1.3_20110806.exe

3. 14 links for mobileEx_setup_v3.5_rev1.3_20110806.exe

4. 14 links for mobileEx_setup_v3.5_rev1.3_20110806.exe

5. 14 links for mobileEx_setup_v3.5_rev1.3_20110806.exe

6. 14 links for mobileEx_setup_v3.5_rev1.3_20110806.exe

7. 14 links for mobileEx_setup_v3.5_rev1.3_20110806.exe

8. 14 links for mobileEx_setup_v3.5_rev1.3_20110806.exe

9. 14 links for mobileEx_setup_v3.5_rev1.3_20110806.exe

10. 14 links for mobileEx_setup_v3.5_rev1.3_20110806.exe

11. 14 links for mobileEx_setup_v3.5_rev1.3_20110806.exe

12. 14 links for mobileEx_setup_v3.5_rev1.3_20110806.exe

13. 14 links for mobileEx_setup_v3.5_rev1.3_20110806.exe

14. 14 links for mobileEx_setup_v3.5_rev1.3_20110806.exe

15. 14 links for mobileEx_setup_v3.5_rev1.3_20110806.exe

16. 14 links for mobileEx_setup_v3.5_rev1.3_20110806.exe

17. 14 links for mobileEx_setup_v3.5_rev1.3_20110806.exe

18. 14 links for mobileEx_setup_v3.5_rev1.3_20110806.exe

19. 14 links for mobileEx_setup_v3.5_rev1.3_20110806.exe

20. 14 links for mobileEx_setup_v3.5_rev1.3_20110806.exe

21. 14 links for mobileEx_setup_v3.5_rev1.3_20110806.exe

22. 14 links for mobileEx_setup_v3.5_rev1.3_20110806.exe

23. 14 links for mobileEx_setup_v3.5_rev1.3_20110806.exe

24. 14 links for mobileEx_setup_v3.5_rev1.3_20110806.exe

25. 14 links for mobileEx_setup_v3.5_rev1.3_20110806.exe

26. 14 links for mobileEx_setup_v3.5_rev1.3_20110806.exe

27. 14 links for mobileEx_setup_v3.5_rev1.3_20110806.exe

28. 14 links for mobileEx_setup_v3.5_rev1.3_20110806.exe

29. 14 links for mobileEx_setup_v3.5_rev1.3_20110806.exe

30. 14 links for mobileEx_setup_v3.5_rev1.3_20110806.exe


!!! MXKEY CABLES - LED SERIES !!!
17 pcs SL3 cables in 1 SET, 44 phones supported

MXKEY CABLES - LED SERIES - 17 pcs cables in 1 SET, 44 phones supported (WORLD FIRST) - GSM-Forum


!!! MXKEY CABLES - LED SERIES !!!
11 pcs SL3 cables in 1 SET, 15 phones supported

MXKEY CABLES - LED SERIES - 11 pcs cables in 1 SET, 15 phones supported (WORLD FIRST) - GSM-Forum

(IMG Tutorials) Most common repairs for the iPhone 4


How to Replace Your iPhone’s Rear Panel

Step 1

• Before disassembling your iPhone, be sure it is powered off.
• Remove the two 3.6 mm Phillips screws next to the dock connector. (Apple has recently substituted the two Phillips screws with 5-Point “Pentalobe” screws. If your iPhone 4 has 5-Point “Pentalobe” screws instead of Phillips, please refer to the second picture.)
• Remove the two 3.6 mm Pentalobe screws next to the dock connector.
• During reassembly, we recommend you replace the 5-point screws with equivalent Phillips screws. Our Liberation Kit provides the tools and screws needed to replace the Pentalobe screws with Phillips screws.
• The 5-Point Screwdriver should only be used once, as it has the potential to strip the screws.

Step 2
• Push the rear panel toward the top edge of the iPhone. (The panel will move about 2mm.)

Step 3
• Lift the rear panel away from the iPhone.

How to Replace Your iPhone’s Battery

Step 1
• Before disassembling your iPhone, be sure it is powered off.
• Remove the two 3.6 mm Phillips screws next to the dock connector.
• Apple has recently substituted the two Phillips screws with 5-Point “Pentalobe” screws. If your iPhone 4 has 5-Point “Pentalobe” screws instead of Phillips, please refer to the second picture.
• Remove the two 3.6 mm Pentalobe screws next to the dock connector.
• During reassembly, we recommend you replace the 5-point screws with equivalent Phillips screws. Our Liberation Kit provides the tools and screws needed to replace the Pentalobe screws with Phillips screws.
• The 5-Point Screwdriver should only be used once, as it has the potential to strip the screws.

Step 2
*Push the rear panel toward the top edge of the iPhone. (The panel will move about 2mm.)

Step 3
• Lift the rear panel away from the iPhone.

Step 4
• Remove the single 2.5 mm Phillips screw securing the battery connector to the logic board.

Step 5
• Use an iPod opening tool to carefully pry the battery connector up from the ends closest to the top and bottom edges of the iPhone.
• Do not pry against the contact clip.
• Remove the contact clip from the iPhone.

Step 6
• Use the clear plastic pull tab to gently lift the battery out of the iPhone.
• Be careful when removing the battery with the plastic pull tab. On some units, Apple uses an excessive amount of glue, making it virtually impossible to remove the battery in this fashion (with the tab possibly tearing due to excessive force).
• For batteries that “stick”, you could use the iPod opening tool to assist (take extra care whilst doing so).
• Remove the battery.
• Before reconnecting the battery connector, be sure the pressure contact (shown in red) is properly positioned next to the battery connector.
• Before reassembly, be sure to clean all metal-to-metal contact points on the pressure contact as well as its contact point on the rear panel with a de-greaser such as windex. The oils on your fingers have the potential to cause wireless interference issues.
More  IMG Tutorials See Here: Go

iPhone 4 Camera solution and measure points


this solution is tested 100%

Front camera not working (water damage)


This image has been resized. Click this bar to view the full image. The original image is sized 720x406.


By________________

Useful Tips/Rules For JAF Box

Useful Tips/Rules For JAF Box Some Useful Tips/Rules for Your JAF Box ...
1. Do not use JAF Box in 1.98.64 or 1.98.65 or 1.98.66 or any BETA version. (Use Only 1.98.63 or 1.98.62 or old version)
2. Do not use JAF Box in MX-Key.
3. Do not use JAF Box in any other third party's software.
4. Do not use JAF Box in OGM or any PKey Emulator/Cracker.
5. Do not use JAF Box in any Firmware Upgrade /Downgrade Software (POTATO_JAFBox_Updater, Oxtco Firmware Upgrader, ETC)

If you do this your JAF BOX will destroy or dead, like this ...
1. Can't find boot file in CHK or Flashing.
2. Can't Upgrade or Downgrade JAF Firmware.
3. PW,TX,RX,USB Lights are Blinking or not.
4. JAF Box Init ERROR.
5. Phone not found.
6. Error reading phone init data...
7. Insert Activated P-Key... ETC

So Be Careful about Your JAF Box.


★★JAF repair solution tested 100%★★

New Solution Repair box JAF without resisters 330 and without remove chip LVC244A
Step 1: You have to find a stem LPT port cable as shown:


Just like on the Jack LPT port to attach to the back of the computer.

And on what it has stated that Jack LPT number from 1 to 25 feet (see wealth in'll see). And we only care about 4 feet.

Pin 6( called SCK)
Pin 7( called Mosi)
Pin 9( called reset)
Pin10( called miso)

As shown below:


Step 2: Open Box JAF and welding as Figure 1 below.


Step 3: View behind JAF BOX. using a scalpel and cut as shown in Figure 3 below.


Step 4: Connect the USB for the JAF Box to use GND and 5V Voltage

Step 5: Download: soft + Firmware of JAF box

RapidShare: 1-CLICK Web hosting - Easy Filehosting

Step 6: Install PonyProg_V207c

Step 7: After installation is complete, we set up as shown below.


Tested by ME and work 1000000%

Saturday, August 6, 2011

Nokia 1100_1112_2300_2630 all solution


1100 ringer final solution

i have a final solution for 1100 ringer problem if all ways and resistors broken near ringer point just make this jumper 10000000% working tested by me many times
 

Twitter Delicious Facebook Digg Stumbleupon Favorites More

 
Design by Free WordPress Themes | Bloggerized by Lasantha - Premium Blogger Themes | Best Web Host